Installation
Installation
System Requirements
Hardware
The following machine recommendations are for installing individual PADAS components:
Software
{% include docs/sysreq_confluent.md %}
Operating Systems
PADAS supports the following operating systems.
Java
{% include docs/sysreq_java.md %}
Manual Install Using TAR Archive
Download the software
- Download the latest version here: padas-{{ site.data.versions.latest_version }}.tgz or via command line:
NOTE: You can verify the integrity by checking against its SHA512 checksum: padas-{{ site.data.versions.latest_version }}.tgz.sha512
curl -O https://www.padas.io/assets/downloads/padas-{{ site.data.versions.latest_version }}.tgz - Extract contents of the archive (default
/optis assumed for$PADAS_HOME)cd /opt tar xvf padas-{{ site.data.versions.latest_version }}.tgz
You should have these directories: {% include docs/padas_folders.md %}
IMPORTANT NOTE: It is recommended to create a separate user to run Padas, other than root. In our examples, we use padas as both the user and group name. Following is an example on how to create such user:
sudo useradd -d /opt/padas -U padas
Register as a Service
- Run Padas to create a service file. (Note: following examples assume
$PADAS_HOMEto be/opt/padasdirectory)bin/padas set-service Systemd unit file has been created as '/opt/padas/libs/padas.service' - Review the generated service file (
libs/padas.service) and edit as necessary (e.g. user & group information, JVM memory options according to your system settings)[Unit] Description=PADAS - Alert Detection for Streaming Events Documentation=https://www.padas.io/docs After=network.target # [Service] Type=simple User=padas Group=padas ExecStart=java -Xmx1G -Xms1G -Dconfig.file=/opt/padas/etc/padas.properties -Dlogging.config=/opt/padas/etc/logback.xml -jar /opt/padas/libs/padas-{{ site.data.versions.latest_version }}.jar TimeoutStopSec=180 Restart=no # [Install] WantedBy=multi-user.target - Copy the service file under system
sudo cp /opt/padas/libs/padas.service /etc/systemd/system/ - Reload systemd process
sudo systemctl daemon-reload
Start For the First Time
IMPORTANT NOTE: You need a running Kafka environment (Broker(s) and Schema Registry) and a PADAS license key. Request a license key if you don't have one.
Manager
- Edit
etc/padas.propertiesfile to reflect your environment and enter the license key. Note thatpadas.instance.roleMUST bemanager.padas.instance.role=manager bootstrap.servers=localhost:9092 schema.registry.url=http://localhost:8081 padas.license=<ENTER YOUR LICENSE KEY HERE> - Use command-line interface (CLI) to start PADAS:
cd $PADAS_HOME/bin ./padas start - PADAS displays the license agreement and prompts you to accept in order to continue.
- Create admin username. This is the user that you log into PADAS Manager with.
Please enter an administrator username? [admin]: - Create the password for the user that you just created.
Password must contain at least 8 total printable ASCII characters. Please enter a new password: Please repeat the password: Successfully saved password. - By default, Manager web interface starts on tcp/9000 port. Open a browser and access PADAS Manager (e.g. http://localhost:9000). For any custom configurations please go to Admin Guide
- Once logged in, unless the topics are created separately, Manager will prompt you to create the required Kafka topics.
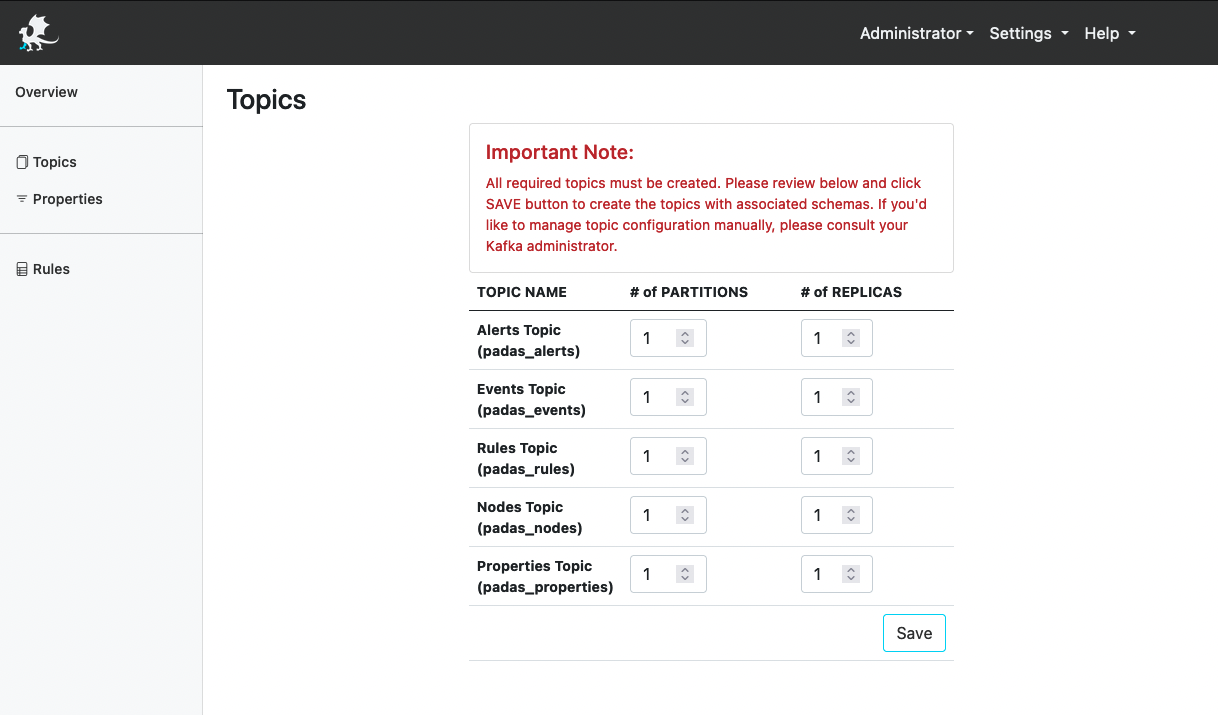
IMPORTANT NOTE: Number of partitions for each topic needs to be determined based on the expected event data load, performance requirements and your Kafka cluster setup. Please consult your Kafka administrator or PADAS representative for assistance. Once set, number of partitions can not be changed (the topic needs to be deleted and re-created). -
Go to Rules menu link and click Edit button in order to add rules. You can upload our out-of-the-box MITRE ATT&CK compatible rules, padasRules.json, that work with Winlogbeat eventlog from
winlogbeat-sysmonandwinlogbeat-securitydatamodels inpadas_events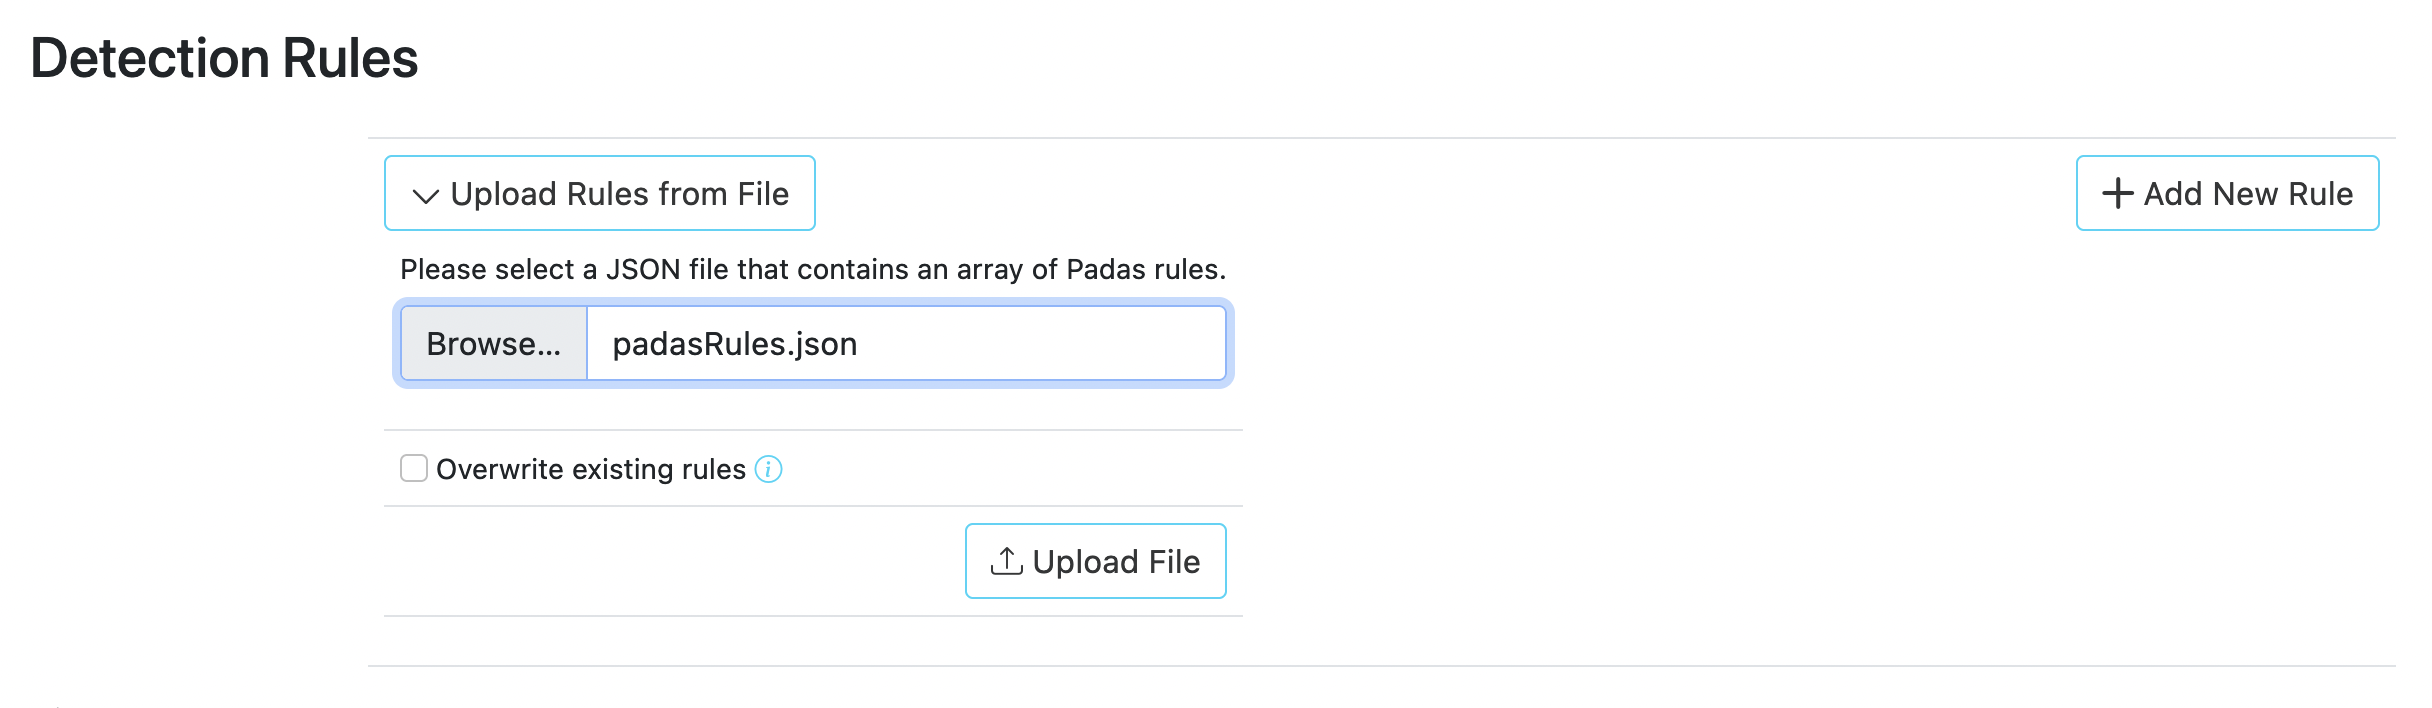
9. Go to Properties menu link and click Edit button in order to add properties. You can upload out-of-the-box transformations for Winlogbeat, padas_transformation.properties, which are configured for gettingwinlogbeat-sysmonandwinlogbeat-securitytopics transformed intopadas_events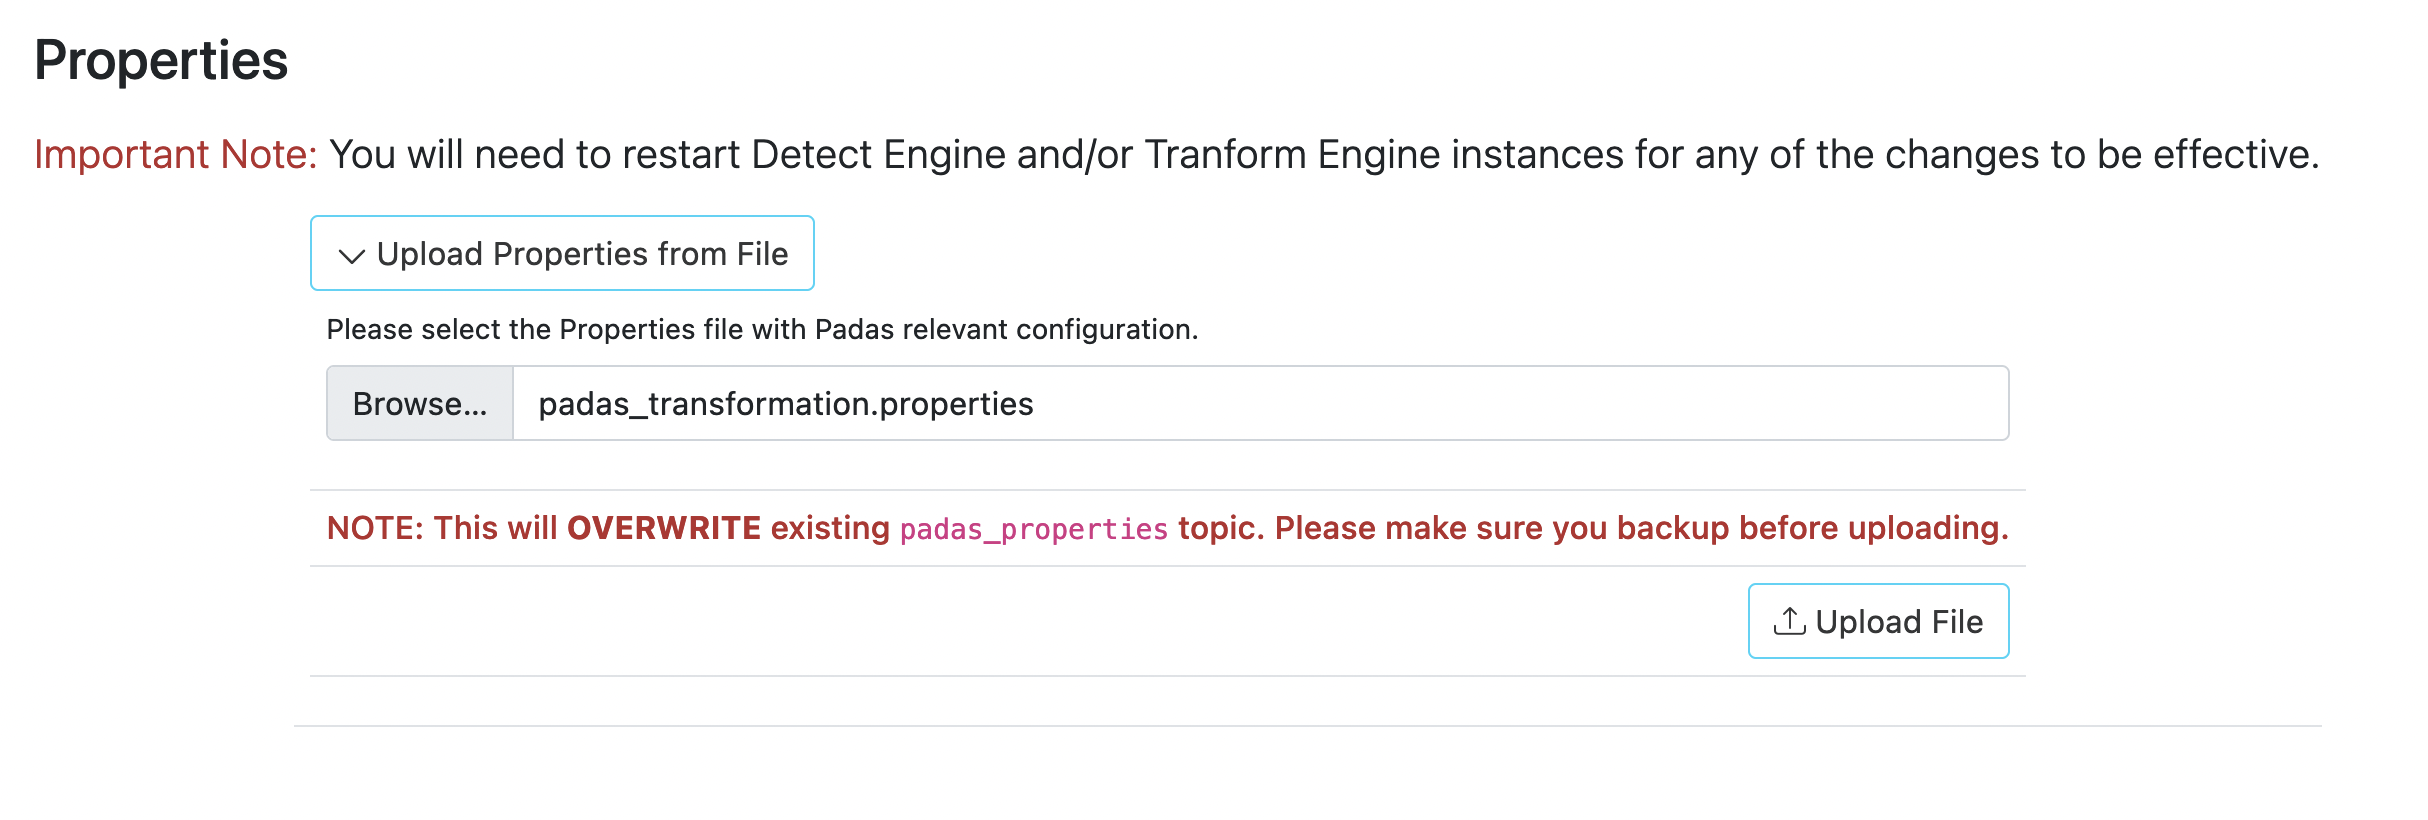
Detect Engine
- Edit
etc/padas.propertiesfile to reflect your environment. Note thatpadas.instance.roleMUST bedetect(default setting).padas.instance.role=detect bootstrap.servers=localhost:9092 schema.registry.url=http://localhost:8081 - Use command-line interface (CLI) to start PADAS:
cd $PADAS_HOME/bin ./padas start - PADAS displays the license agreement and prompts you to accept in order to continue.
- Edit
Transform Engine
- Edit
etc/padas.propertiesfile to reflect your environment. Note thatpadas.instance.roleMUST betransform.padas.instance.role=detect bootstrap.servers=localhost:9092 schema.registry.url=http://localhost:8081 - Use command-line interface (CLI) to start PADAS:
cd $PADAS_HOME/bin ./padas start - PADAS displays the license agreement and prompts you to accept in order to continue.
PADAS Command Line Interface
A wrapper script is provided to manage PADAS service: $PADAS_HOME/bin/padas
Example outputs when components are started for the first time.
Manager:
Detect Engine:
Transform Engine:
Uninstall
- Remove Padas directory. For example:
rm -rf /opt/padas
Docker
TBD